20+ year music industry veteran and business professional, Zach Spruill, offers insight on equipment and best practices for musicians to easily and affordably improve the professionalism of their audio and video for their Zoom meetings, music lessons, and performances.

The Reality
If you haven’t figured it out yet, Zoom is here to stay. It’s true that the video platform exploded as businesses world-wide transitioned to remote solutions during the Covid-19 pandemic. However, as businesses and individuals have spent the last year discovering the inherent value and convenience of remote communication, learning, and business management the power of this platform is sure to continue to grow and develop post-pandemic as well. Long story short...if you haven’t refined your Zoom setup yet, it’s time to get on board. As a business management professional and 20+ year music industry veteran, I’ve spent the last year refining my audio/video equipment setup to provide the highest quality Zoom music and video experience possible at an affordable price. This is especially true for musicians that may have some good equipment already. In this post, I’ll show you what specific equipment I use as well as alternative options for price-conscious Zoomers.
The Microphone
Let’s start with the first step in the input audio chain...the microphone. The most cost effective microphone would obviously be the one that is built in to the device you are using. While these are often ok for spoken word, especially those built-in to newer model devices, their frequency range is limited and they are not designed to accommodate the more complex and wider range of frequencies produced by acoustic instruments. For example, if I spoke into the built-in microphone of my MacBook Pro it might sound ok. However, if I played my saxophone into it...it would be completely overblown and distorted. This goes for PCs and mobile devices as well. To solve this issue, I recommend investing in a quality microphone. The most affordable and easy microphone solution for a simple but effective Zoom setup (on a laptop or desktop computer) is a USB Mic such as the Blue Yeti. Simply plug it in to your computer via USB, and off you go. You can also use any studio quality condenser microphone by adding an audio interface to your setup. More on that shortly.

Click here for original source of the above Blue Yeti photo
If the Yeti is out of your price range, but you’d really like to improve your mic without spending much extra cash…consider this affordable USB Mic option from the folks at Fifine. View on Amazon.

Audio Interface
USB Mics often do a good job, but to achieve the best sound quality possible and greater flexibility for your setup without breaking the bank, I highly recommend an audio interface. An audio interface plugs directly into your computer and allows you to make use of any microphone or instrument capable of being plugged in. Depending on the interface you select, many will allow you to use multiple microphones or instruments simultaneously; ideal for musicians. Focusrite, for example, has many affordable and flexible options. The Focusrite Scarlett Solo is a great introductory option that will allow you to plug one studio condenser microphone and one instrument in to use simultaneously while Zooming. Many companies like Focusrite sell packages that include the audio interface, microphone, and headphones as an affordable way to improve your Zoom experience and get some great bang for buck. Other notable audio interface brands to check out are PreSonus, Behringer, M-Audio, and more. Contact your preferred music retailer for suggestions.

Personally, I use a Bose T4S ToneMatch Mixer as my audio interface. This gives me the ability to have up to 4 microphones or instruments as well as other audio signals (such as backing tracks) plugged in at once. It also allows me to apply effects, such as reverb and compression, to make the mix sound more polished. Other notable USB audio mixer brands you can use as an interface are Yamaha, Behringer, Allen & Heath, and more. Again, contact your preferred music retailer for suggestions.

How am I taking advantage of the multiple inputs on the Bose T4S interface you ask? Here’s my current setup:
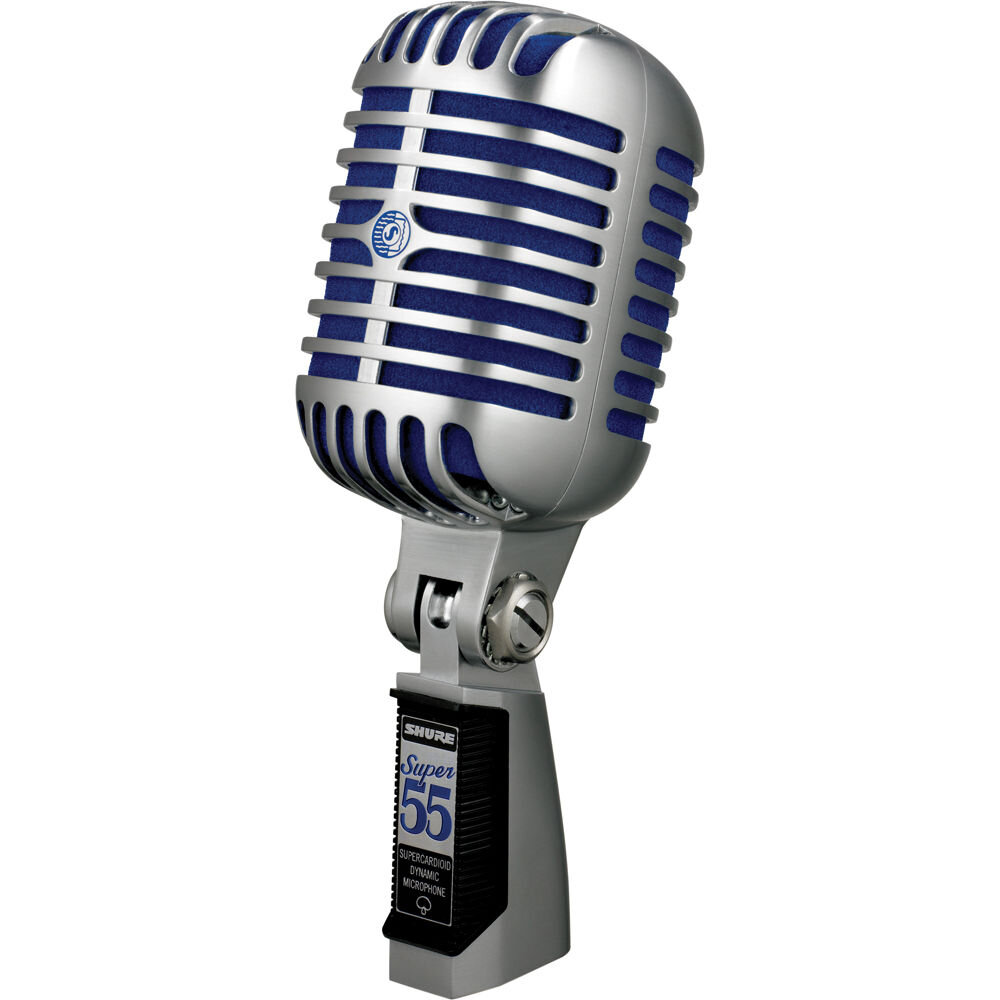
Input 1 - A Shure Super 55 microphone. It sounds great and looks amazing both on screen and in live applications.
Input 2 - Guitar via a standard 1/4” instrument cable
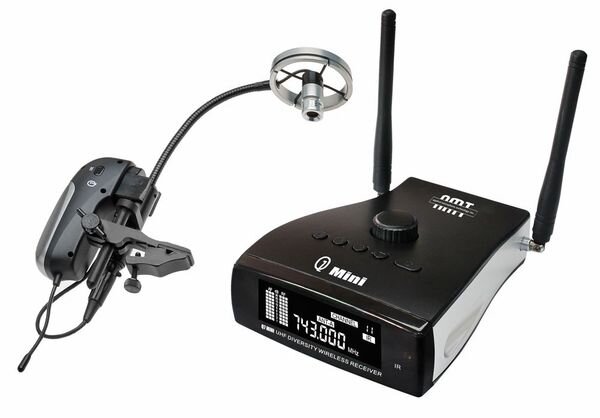
Input 3 - Saxophone via an AMT Q7-LS Mini Applied Microphone Technology Wireless System. I use this system for live performances as well. However, if you want to go a more affordable route, you could also use any other type of instrument mic for your woodwind needs. Although it was designed with vocals in mind, sax also sounds good through the Shure Super 55 mentioned earlier. Condenser microphones are ideal for achieving a more “studio quality” sound.
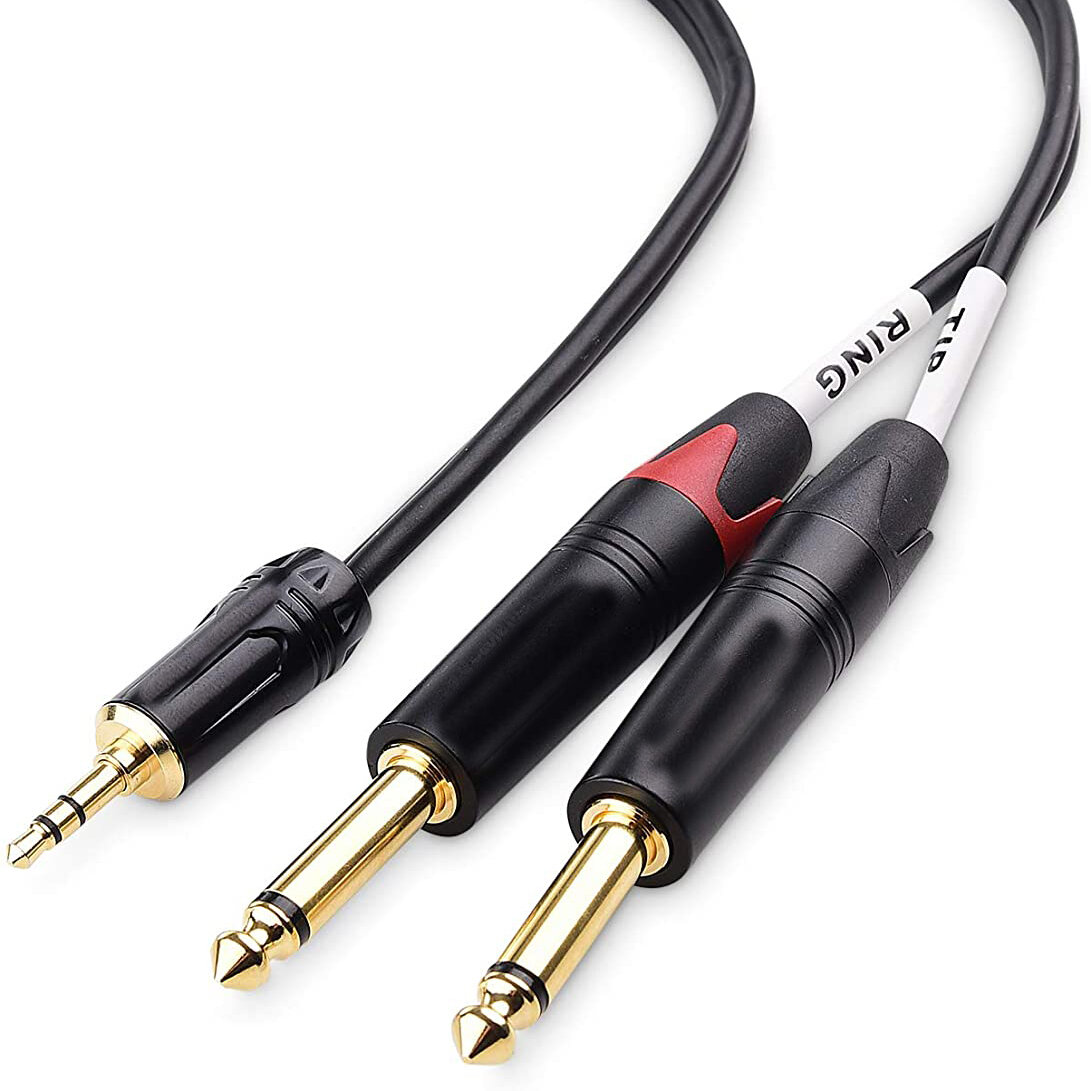
Input 5/6 - Stereo audio from an external device such as an iPad or iPhone. I usually use this for backing tracks to play an instrument along to, or maybe even some light Zoom meeting background music. You will need a 3.5mm to Dual TS Cable like the one below as well as whatever adapter your iPhone, iPad, or other device might require.

Enable High-Fidelity Music Mode
By default Zoom applies background noice cancellation to your meetings. This is great if you need to block out unwanted background noise so that your listeners can focus on your voice. But what if you want your music to be the star of the show? Click here for more information on enabling Zoom’s High-Fidelity Music Mode.
Lighting
Once you decide on the audio equipment that makes sense for your needs and budget, you can easily improve the quality of your video by adding additional lighting. There are a million options for LED lights to help out with this. I’m currently using the very affordable and effective Ubeesize Selfie Ring Light with Tripod Stand, but there are TONS of options in all price points. Research the best option for you.

The Camera
The camera built-in to your device will work, but improving the quality of your video goes a long way and makes it look much more professional. This can be accomplished by adding an HD web cam to your Zoom setup. There a TONS of options available in any price range available, but the Logitech C922x is a popular choice for price conscious Zoomers.

If you have a smart phone with a high quality camera, there are also softwares available that allow you to use your smart phone as a webcam! Personally, I use iOS and MacOS apps from Iriun to take advantage to the amazing camera on my iPhone 12 Pro Max. Opening the app on the iPhone as well as the Mac connects the two and turns your iPhone into a pretty awesome web cam. The image below illustrates me using my iPhone as the camera and the ring light I mentioned earlier.

If you decide to use your mobile device as your web cam, I highly recommend you consider some type of mount to stabilize and hold it where you need it. Example below.

The options for microphones, audio interfaces, lighting, web cameras, and other accessories are seemingly limitless, but I hope the information and examples above help you begin affordably building your own professional looking and sounding Zoom setup. Feel free to leave questions, comments, or recommendations for others in the comment section below. If you found this info helpful, I hope you will also share this article with your fellow musicians on social media.